This video show how to driver 1.44" 128x128 TFT with ST7735 SPI driver (KMR1441_SPI V2) with NodeMCU (ESP8266) using ssd1306 library. Using Arduino IDE.
- In Arduino IDE, open library manager, search ST7735, and install ssd1306 library.
- Open Example > ssd1306 > demos > st7735_demo
- Connect ESP8266 to LCD ESP8266LCD =================== 3V3VCC GND GND D1A0 (D/C) D2CS (CS) RXRESET (RES) D7SDA (DIN) D5SCK (CLK) LED (Open in my test)
This exercise run on ESP8266 (NodeMCU), to get current weather data from OpenWeatherMap.
OpenWeatherMap provide easy-to-work weather APIs. Before you can use the APIs, you have to sign-up your account with email, for free.
After sign-up, and email varified, you can get various weather info using APIs with your api key. For example to get current weather:
http://api.openweathermap.org/data/2.5/weather?q=London,uk&APPID=<your key here>
This example with your api key will be sent you in the confirm email. You can paste it in browser, to receive the response in JSON form.
Copy the returned JSON to the input box in ArduinoJson Assistant, it will return you the Memory pool size, and example to Parsing program.
ArduinoJson is a simple and efficient JSON library for embedded C++. Support various platforms of Arduino framework. Already included in Platform IO.
Here is my exercise run on ESP8266 (NodeMCU), to get current weather data from OpenWeatherMap, using libraries ESP8266WiFi, ESP8266HTTPClient, ArduinoJson, and display on I2C OLED using library ESP8266_SSD1306.
Steps to new a PlatformIO project, for NodeMCU board of Arduino framework, using library and example of ESP8266_SSD1306, to display on I2C SSD1306 OLED display. Tested on Windows 10/VirtualBox.
This example of ESP8266/NodeMCU read input from A0, and output to Serial. The receiving side is a Raspberry Pi 3 running Raspbian Jessie with PIXEL and Arduino IDE installed, the result is display graphically using Arduino IDE's Serial Plotter. All job done on Raspberry Pi 3. ESP8266/NodeMCU connect to the Raspberry Pi 3 with USB.
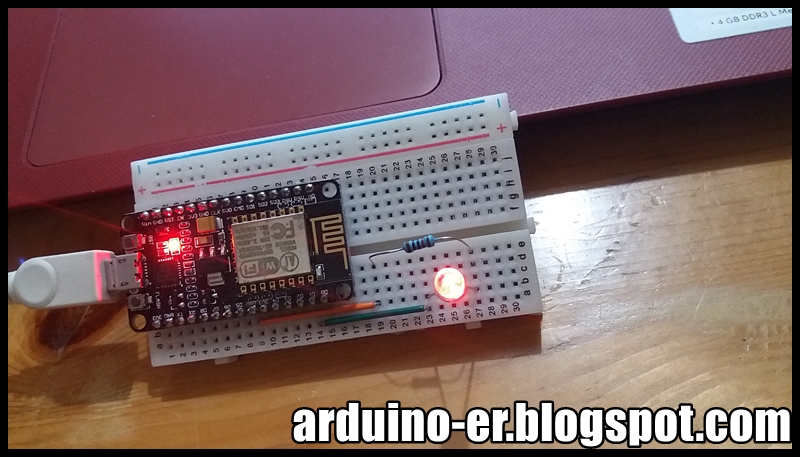
It's another example to setup a simple HTTP-like server, to receive request from client, output PWM, to control color/brightness of RGB LED.
NodeMCU_WiFiWebServer_RGB.ino
/*
 *  This sketch run on NodeMCU (ESP8266),
 *  demonstrates how to set up a simple HTTP-like server.
 *  The server will set a GPIO pins depending on the request,
 *  to control the brightness of RGB LED connected to:
 *    D0 : BLUE
 *    D1 : GREEN
 *    D2 : RED
 *
 *    http://server_ip/rgb/rrggbb/
 *    where rr is the value set RED
 *    where gg is the value set GREEN
 *    where bb is the value set BLUE
 *    then terminate with '/'
 *  server_ip is the IP address of the NodeMCU, will be
 *  printed to Serial when the module is connected.
 */

#include <ESP8266WiFi.h>

const char* ssid = "Xtation";
const char* password = "password";

int ledB = D0;
int ledG = D1;
int ledR = D2;

// Create an instance of the server
// specify the port to listen on as an argument
WiFiServer server(80);

void setup() {
  Serial.begin(115200);
  delay(10);

  // prepare GPIOs for RGB LED
  pinMode(D0, OUTPUT);
  pinMode(D1, OUTPUT);
  pinMode(D2, OUTPUT);
  analogWriteRange(99); //PWM: 0~99

  // Connect to WiFi network
  Serial.println();
  Serial.println();
  Serial.print("Connecting to ");
  Serial.println(ssid);

  WiFi.begin(ssid, password);

  while (WiFi.status() != WL_CONNECTED) {
    delay(500);
    Serial.print(".");
  }
  Serial.println("");
  Serial.println("WiFi connected");

  // Start the server
  server.begin();
  Serial.println("Server started");

  // Print the IP address
  Serial.println(WiFi.localIP());
}

void loop() {
  // Check if a client has connected
  WiFiClient client = server.available();
  if (!client) {
    return;
  }

  // Wait until the client sends some data
  Serial.println("new client");
  while(!client.available()){
    delay(1);
  }

  // Read the first line of the request
  String req = client.readStringUntil('\r');
  Serial.println(req);
  client.flush();

  // Match the request
  int valR, valG, valB;
  String subStringR, subStringG, subStringB;
  int index = req.indexOf("/rgb/");
  if(index != -1){
    if(req.charAt(index+11)=='/'){
      subStringR = req.substring(index+5, index+7);
      subStringG = req.substring(index+7, index+9);
      subStringB = req.substring(index+9, index+11);
      Serial.println("R: " + subStringR);
      Serial.println("G: " + subStringG);
      Serial.println("B: " + subStringB);

      valR = subStringR.toInt();
      valG = subStringG.toInt();
      valB = subStringB.toInt();
      Serial.println("valR: " + String(valR));
      Serial.println("valG: " + String(valG));
      Serial.println("valB: " + String(valB));

    }
    else{
      Serial.println("Not terminated with /");
      client.stop();
      return;
    }
  }
  else {
    Serial.println("No /rgb/ found");
    client.stop();
    return;
  }

  // Set GPIOs according to the request
  // No check valid of the requested setting
  analogWrite(ledR, valR);
  analogWrite(ledG, valG);
  analogWrite(ledB, valB);

  client.flush();

  // Prepare the response
  String s = "HTTP/1.1 200 OK\r\nContent-Type: text/html\r\n\r\n<!DOCTYPE HTML>\r\n<html>\r\nGPIOs of RGB is now ";
  s += String(valR) +":" + String(valG) + ":" + String(valB);
  s += "</html>\n";

  // Send the response to the client
  client.print(s);
  delay(1);
  Serial.println("Client disonnected");

  // The client will actually be disconnected
  // when the function returns and 'client' object is detroyed
}
Example of NodeMCU with ESP8266 Arduino Core to output PWM by calling analogWrite(), to control brightness of RGB LED.
NodeMCU_PWM.inf
int ledB = D0;
int ledG = D1;
int ledR = D2;

void setup() {
  pinMode(D0, OUTPUT);
  pinMode(D1, OUTPUT);
  pinMode(D2, OUTPUT);
  //Set PWM frequency 500, default is 1000
  //Set range 0~100, default is 0~1023
  analogWriteFreq(500);
  analogWriteRange(100);
}

// the loop function runs over and over again forever
void loop() {
  analogWrite(ledR, 0);
  analogWrite(ledG, 0);
  analogWrite(ledB, 0);
  delay(500);
  analogWrite(ledR, 100);
  analogWrite(ledG, 100);
  analogWrite(ledB, 100);
  delay(500);
  analogWrite(ledR, 0);
  analogWrite(ledG, 0);
  analogWrite(ledB, 0);
  delay(500);

  int i;
  for(i=0; i<100; i++){
    analogWrite(ledR, i);
    delay(10);
  }
  analogWrite(ledR, 0);

  for(i=0; i<100; i++){
    analogWrite(ledG, i);
    delay(10);
  }
  analogWrite(ledG, 0);

  for(i=0; i<100; i++){
    analogWrite(ledB, i);
    delay(10);
  }
  analogWrite(ledB, 0);

  for(i=0; i<100; i++8){
    analogWrite(ledR, i);
    analogWrite(ledG, i);
    analogWrite(ledB, i);
    delay(10);
  }

  for(i=100; i>0; i--){
    analogWrite(ledR, i);
    analogWrite(ledG, i);
    analogWrite(ledB, i);
    delay(10);
  }

}
Reference: analogWrite(pin, value) enables software PWM on the given pin. PWM may be used on pins 0 to 16. Call analogWrite(pin, 0) to disable PWM on the pin. value may be in range from 0 to PWMRANGE, which is equal to 1023 by default. PWM range may be changed by calling analogWriteRange(new_range).
PWM frequency is 1kHz by default. Call analogWriteFreq(new_frequency) to change the frequency.
This example show how to read input (D5, D6 & D7) from buttons, and write output (D0, D1 & D2) to LEDs accordingly. For the input, all set INPUT_PULLUP to enable internal pull-up resistor, so no external resistors needed.
Connection:
/*
NodeMCU IO index vs ESP8266 pin
IO index  ESP8266 pin
    0     [*] GPIO16
    1     GPIO5
    2     GPIO4
    3     GPIO0
    4     GPIO2
    5     GPIO14
    6     GPIO12
    7     GPIO13
    8     GPIO15
    9     GPIO3
    10    GPIO1
    11    GPIO9
    12    GPIO10
[*] D0(GPIO16) can only be used as gpio read/write.
No support for open-drain/interrupt/pwm/i2c/ow.
https://nodemcu.readthedocs.io/en/master/en/modules/gpio/
 */

void setup() {
  pinMode(D0, OUTPUT);
  pinMode(D1, OUTPUT);
  pinMode(D2, OUTPUT);
  pinMode(D5, INPUT_PULLUP);
  pinMode(D6, INPUT_PULLUP);
  pinMode(D7, INPUT_PULLUP);
}

// the loop function runs over and over again forever
void loop() {
  if(digitalRead(D5)){
    digitalWrite(D0, LOW);
  }else{
    digitalWrite(D0, HIGH);
  }

  if(digitalRead(D6)){
    digitalWrite(D1, LOW);
  }else{
    digitalWrite(D1, HIGH);
  }

  if(digitalRead(D7)){
    digitalWrite(D2, LOW);
  }else{
    digitalWrite(D2, HIGH);
  }

}
Usage of GPIO:
At the beginning, I want to use D6, D7 and D8 as input. But D8 always return LOW. After googled and found schematic diagram of NodeMCU DevKit v1.0 here: https://github.com/nodemcu/nodemcu-devkit-v1.0/blob/master/NODEMCU_DEVKIT_V1.0.PDF. It's found that GPIO15 (D8) connect to GND via a resistor, so always return LOW.
And MATTERS NEEDING ATTENTION can be found in the schematic diagram: On every boot/reset/wakeup, GPIO15 MUST keep LOW, GPIO2 MUST keep HIGH. GPIO0 HIGH -> RUN MODE, LOW -> FLASH MODE. When you need to use the sleep mode, GPIO16 and RST should be connected, and GPIO16 will output LOW to reset the system at the time of wakeup.
There are many version of ESP8266, the printed mark on PCB may not the io number of ESP8266 MCU, you have to check it for your board. This example run on NodeMCU with marking and CPU pin assignment:
NodeMCU IO index vs ESP8266 pin
IO index  ESP8266 pin
    0     [*] GPIO16
    1     GPIO5
    2     GPIO4
    3     GPIO0
    4     GPIO2
    5     GPIO14
    6     GPIO12
    7     GPIO13
    8     GPIO15
    9     GPIO3
    10    GPIO1
    11    GPIO9
    12    GPIO10
[*] D0(GPIO16) can only be used as gpio read/write.
No support for open-drain/interrupt/pwm/i2c/ow.
https://nodemcu.readthedocs.io/en/master/en/modules/gpio/
If you run on NodeMCU and select board of NodeMCU 1.0, you can use D1~D10 to access the pins. Refer to pins_arduino.h. Both D1 and 5 refer to the same pin.
If you run on other module, and select other board, may be the compile will report error of 'D1' was not declared in this scope. You have to specify the io# of the MCU, 5 in this case.
NodeMCU_Blink.ino
/*
NodeMCU IO index vs ESP8266 pin
IO index  ESP8266 pin
    0     [*] GPIO16
    1     GPIO5
    2     GPIO4
    3     GPIO0
    4     GPIO2
    5     GPIO14
    6     GPIO12
    7     GPIO13
    8     GPIO15
    9     GPIO3
    10    GPIO1
    11    GPIO9
    12    GPIO10
[*] D0(GPIO16) can only be used as gpio read/write.
No support for open-drain/interrupt/pwm/i2c/ow.
https://nodemcu.readthedocs.io/en/master/en/modules/gpio/
 */

/*
 * For NodeMCU (8266) both D1 and 5 refer to the same pin
 * For others, such as "Generic ESP8266 Module", it will
 * report error of: 'D1' was not declared in this scope.
 */
const int io5 = 5;

// the setup function runs once when you press reset or power the board
void setup() {
  // initialize digital pins as an output.
  pinMode(LED_BUILTIN, OUTPUT);
  //pinMode(D1, OUTPUT);
  pinMode(io5, OUTPUT);
}

// the loop function runs over and over again forever
void loop() {
  digitalWrite(LED_BUILTIN, HIGH);
  //digitalWrite(D1, HIGH);
  digitalWrite(io5, HIGH);
  delay(500);
  //digitalWrite(D1, LOW);
  digitalWrite(io5, LOW);
  delay(500);
  digitalWrite(LED_BUILTIN, LOW);
  //digitalWrite(D1, HIGH);
  digitalWrite(io5, HIGH);
  delay(500);
  //digitalWrite(D1, LOW);
  digitalWrite(io5, LOW);
  delay(500);
}
It's a 1.3" 128x64 OLED of SPI interface, with SH1106 controller. The SH1106 is in general similar to the SSD1306. Main difference is a memory of 132x64 instead of 128x64.
This post show how to connect with NodeMCU and install the library of esp8266-oled-sh1106.
Connection between NodeMCU and the 1.3" 128x64 OLED SPI module with SH1106:
esp8266-oled-ssd1306 is a driver for the SSD1306 based 128x64 pixel OLED display running on the Arduino/ESP8266 platform. Can be used with either the I2C or SPI version of the display
You can either download this library as a zip file and unpack it to your Arduino/libraries folder or (once it has been added) choose it from the Arduino library manager.
This video show how to install on Arduino IDE using Library Manager, and run the example.
This example show how NodeMCU/ESP8266 read separate file in Flash File System.
In order to upload extra files to NodeMCU/ESP8266, a tool "ESP8266FS" is needed:
ESP8266FS is a tool which integrates into the Arduino IDE. It adds a menu item to Tools menu for uploading the contents of sketch data directory into ESP8266 flash file system.
In your Arduino sketchbook directory, create tools directory if it doesn't exist yet
Unpack the tool into tools directory (the path will look like <home_dir>/Arduino/tools/ESP8266FS/tool/esp8266fs.jar)
Restart Arduino IDE
Open a sketch (or create a new one and save it)
Go to sketch directory (choose Sketch > Show Sketch Folder)
Create a directory named data and any files you want in the file system there
Make sure you have selected a board, port, and closed Serial Monitor
Select Tools > ESP8266 Sketch Data Upload. This should start uploading the files into ESP8266 flash file system. When done, IDE status bar will display SPIFFS Image Uploaded message.
Example to read text file, test.txt, from Flash File System:
ESP_ext_file.ino
//arduino-er.blogspot.com
//To read separate file in file system
#include "FS.h"

void prepareFile(){

  Serial.println("Prepare file system");
  SPIFFS.begin();

  File file = SPIFFS.open("/test.txt", "r");
  if (!file) {
    Serial.println("file open failed!");
  } else{
    Serial.println("file open success:)");

    while (file.available()) {
      Serial.write(file.read());
    }
    file.close();
  }
}

void setup() {
  Serial.begin(115200);
  Serial.println("To read separate file in file system");
  prepareFile();
}

void loop() {
  // put your main code here, to run repeatedly:

}
Connect your mobile to the AP "arduino-er" with password "12345678", open browser and visit IP 192.168.4.1. Then you can control the RGB LED in web page. As shown in the video, more than one device can connect to and control the RGB LED at the same time.
Simple sketch run on NodeMCU/ESP8266 to get chip and flash info.
ESP_GetFlashSize.ino
//reference:
//http://esp8266.github.io/Arduino/versions/2.1.0/doc/libraries.html

void setup() {
  Serial.begin(9600);
  Serial.println();
  Serial.println();

  Serial.println("http://arduino-er.blogspot.com/");
  Serial.println("ESP chip and flash info");
  Serial.printf("The ESP8266 chip ID as a 32-bit integer:\t%08X\n", ESP.getChipId());
  Serial.printf("The flash chip ID as a 32-bit integer:\t\t%08X\n", ESP.getFlashChipId());
  Serial.printf("Flash chip frequency:\t\t\t\t%d (Hz)\n", ESP.getFlashChipSpeed());

  /* ESP.getFlashChipSize() returns the flash chip size, in bytes,
   * as seen by the SDK (may be less than actual size).
   */
  Serial.printf("Flash chip size:\t\t\t\t%d (bytes)\n", ESP.getFlashChipSize());

  Serial.printf("Free heap size:\t\t\t\t\t%d (bytes)\n", ESP.getFreeHeap());


}

void loop() {


}
This post show how to program NodeMCU (ESP8266) on Arduino IDE (with ESP8266 core for Arduino), to display on 0.96 inch 128X64 I2C OLED (base on SSD1306), using Adafruit SSD1306 and Adafruit GFX Libraries.
- It's assumed you are programming NodeMCU on Arduino Software, with ESP8266 core for Arduino installed.
(reamrk: the Fritzing parts of can OLED_SSD1306_I2C_128x64 can be download HERE)
- Add OLED library to Arduino Software:
* Open Library Manager in Arduino IDE, search SSD1306. You can find Adafruit SSD1306 library, SSD1306 OLED driver library for 'monochrome' 128x64 and 128x32 OLEDs. Install it.
* Install Adafruit GFX Library also.
If you get error of "Height incorrect, please fix Adafruit_SSD1306.h!":
Open Adafruit_SSD1306.h file, in the path like "C:\Users\user\Documents\Arduino\libraries\Adafruit_SSD1306\Adafruit_SSD1306.h". Un-comment "#define SSD1306_128_64", and comment "#define SSD1306_128_32".
- Return to the Adafruit SSD1306 library again. Visit the web site of the library, https://github.com/adafruit/Adafruit_SSD1306. It's Tested Works on ESP8266 (Adafruit Huzzah), but have to change OLED_RESET to different pin if using default I2C pins D4/D5.
There are no RESET signal on my I2C OLED, so I assign it to any pin, LED_BUILTIN (the on-board LED).
- Make sure the I2C address is correct:
My I2C OLED have address 3C, correct the code display.begin(SSD1306_SWITCHCAPVCC, 0x3C);
where testNodeMCU is the id of your thing in dweet.io, 123 is the value to update.
This code run on NodeMCU (suppose other standalone ESP8266 also), to connect to WiFi as client, read analog input from A0, and update dweet.io. (It's modified from Examples > ESP8266WiFi > WiFiClient,)