Wednesday, August 28, 2013

Device to Cloud: Prototyping Platforms

Device to Cloud, Hands-On. Part 1: Prototyping Platforms

It's the first part of a series of episode. A range of embedded systems prototyping platforms will be explored. and also how to connect tiny devices into the cloud for fun, scale, and security.

In today's episode I'm going to give an overview of the prototyping platforms I'm going to explore in the upcoming few weeks. I'm initially going to focus on platforms that are cheap to buy and have existing communities, so that you can play along if you like: Arduino, Gadgeteer, Netduino, Android ADK, Seeedstudio Grove, and Raspberry Pi. Later this year, we'll also take a look at prototyping/evaluation platforms for industrial microcontrollers.

Today and in the next few episodes, I'll be starting with the Arduino Ethernet board, which I bought as part of a Fritzing Starter Kit. Fritzing.org is an open-source hardware design initiative by the Interaction Design Lab at the University of Applied Sciences in Potsdam, Germany.

Source: http://channel9.msdn.com/Blogs/Subscribe/Device-to-Cloud-Hands-On-Part-1-Prototyping-Platforms

Thursday, August 22, 2013

Processing example: simple animation of sin()

Processing example: simple animation of sin()


int x = 0;

void setup(){
  size(400, 300);
  background(200);
  stroke(0);

}

void draw() {
  
  x += 1;
  if(x > width){
    x = 0;
    background(200);
  }
  
  int center = height/2;
  float angle = x * 4 * PI /width;
  int l = (int)(sin(angle)*height/2);
  line(x, center, x, l + center); 
}


Processing on desktop vs Processing for Android

It's the same code (from last post, Processing example: curve()) run on Android for Processing.

Run on Android device, Nexus One.


Cross post: Android-er blog - Processing on desktop vs Processing for Android

Wednesday, August 21, 2013

Processing example: curve()

Processing example: curve()

void setup(){
  size(400, 300);
  background(0);
  stroke(255);
}

void draw() {

  noFill();
  
  if(mousePressed){
    background(0);
    point(mouseX, mouseY);
    line(80, 50, mouseX, mouseY);
    line(50, 200, 350, 250);
    curve(80, 50, mouseX, mouseY, 50, 200, 350, 250);

  }
  
}

Processing example: bezier()

Processing example: bezier()

void setup(){
  size(400, 300);
  background(0);
  stroke(255);
}

void draw() {

  noFill();
  
  if(mousePressed){
    background(0);
    point(mouseX, mouseY);
    line(80, 50, mouseX, mouseY);
    line(50, 200, 350, 250);
    bezier(80, 50, mouseX, mouseY, 50, 200, 350, 250);

  }
  
}

Monday, August 19, 2013

Processing 2: Create sketch video with Movie Maker

Processing 2 build-in with Movie Maker function, you can easy create video for your sketch. The tool creates QuickTime movie from a sequence of images.

To run Movie Maker, click Processing menu Tools > Movie Maker.

Processing's Movie Maker


Video created with Processing 2 Movie Maker from images saved in last example "Capture images of sketch with saveFrame()".

Processing example: Capture images of sketch with saveFrame()

saveFrame() saves a numbered sequence of images, one image each time the function is run. The following example save frames of the sketch when mouse pressed. The images will be saved in the sketch folder with name "draw-######.png".

void setup() {  // setup() runs once
  size(400, 300);
  background(0);
  stroke(255);
}

void draw() {
  if(mousePressed){
    point(mouseX, mouseY);
    
    //Saves a numbered sequence of images
    saveFrame("draw-######.png");
  }
}

sketch captured with saveFrame()
With the saved images, you can create video with Processing 2 build-in Movie Maker.

Saturday, August 17, 2013

Processing example: free draw something with mouse

Free draw something with mouse


void setup() {
  size(400, 300);
  background(0);
  stroke(255);
}

void draw() {
  if(mousePressed){
    point(mouseX, mouseY);
  }
}


Processing 2.0.2 is available now

Processing updated 2.0.2. Visit: https://processing.org/download/ to download.


Thursday, August 15, 2013

Processing exercise: convert image to grayscale using filter()

Example to convert image to grayscale,  black and white, using filter().

Processing exercise: convert image to grayscale using filter()


PImage myImage1, myImage2;

void setup() {
  myImage1 = loadImage("http://goo.gl/MMeu0o", "png");
  myImage2 = loadImage("http://goo.gl/MMeu0o", "png");
  myImage2.filter(GRAY);
  
  size(450, 300);
  smooth();
}

void draw() {

  image(myImage1, 0, 0);
  image(myImage2, myImage1.width, 0);

}


Wednesday, August 14, 2013

Processing exercise: draw rotated and translated image

Processing exercise: draw rotated and translated image


PImage myImage;

void setup() {
  myImage = loadImage("http://goo.gl/MMeu0o", "png");
  size(400, 400);
  smooth();
}

void draw() {
  //draw in rotated/translated
  rotate(PI/4.0);
  translate(100, 0);
  image(myImage, 0, 0);
  
  //back to original 
  translate(-100, 0);
  rotate(-PI/4.0);
  
  //draw image in half size
  image(myImage, 0, 0, myImage.width/2, myImage.height/2);
}


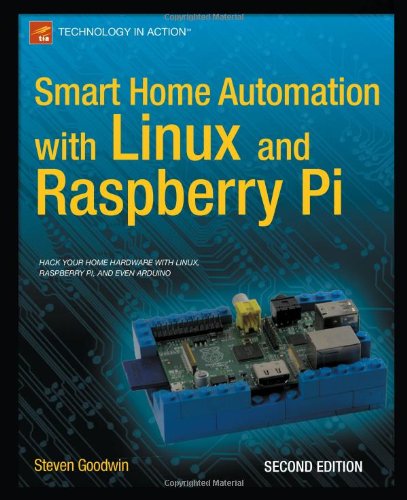
Smart Home Automation with Linux and Raspberry Pi, Second Edition

Smart Home Automation with Linux and Raspberry Pi, Second Edition
Smart Home Automation with Linux and Raspberry Pi shows you how to automate your lights, curtains, music, and more, and control everything via a laptop or mobile phone.

You'll learn how to use Linux, including Linux on Raspberry Pi, to control appliances and everything from kettles to curtains, including how to hack game consoles and even incorporate LEGO Mindstorms into your smart home schemes. 

You’ll discover the practicalities on wiring a house in terms of both and power and networking, along with the selection and placement of servers. There are also explanations on handling communication to (and from) your computer with speech, SMS, email, and web. Finally, you’ll see how your automated appliances can collaborate to become a smart home.

Smart Home Automation with Linux was already an excellent resource for home automation, and in this second edition, Steven Goodwin will show you how a house can be fully controlled by its occupants, all using open source software and even open source hardware like Raspberry Pi and Arduino.

What you’ll learn

  • Control appliances like kettles and curtains both locally and remotely.
  • Find and harness data sources to provide context-aware living.
  • Hack/change existing hardware/software to better fit your needs.
  • Integrate various technologies into a function greater than the whole.
  • Set up a home network, for both network and audio/video traffic.
  • Learn how to incorporate Raspberry Pi, Arduino, and even LEGO Mindstorms into your smart home.

Who this book is for

This book is for amateur and professional Linux users and electronics enthusiasts who want to control their homes and their gadgets.

Table of Contents

  1. Appliance Control: Making Things Do Stuff 
  2. Appliance Hacking: Converting Existing Technology  
  3. Media Systems: Incorporating the TV and the HiFi 
  4. Home is Home: The Physical Practicalities
  5. Communication: Humans Talk, Computers Talk 
  6. Data Sources: Making Homes Smart 
  7. Control Hubs: Bringing It All Together 
  8. Working with Raspberry Pi
June 12, 2013  143025887X  978-1430258872 2

Tuesday, August 13, 2013

processing exercise: load image from internet

Example to load image from internet:

PImage myImage;

void setup() {
  myImage = loadImage("http://goo.gl/MMeu0o", "png");
  size(myImage.width, myImage.height);
  smooth();
}

void draw() {
  image(myImage, 0, 0);
}

processing exercise: load image from internet


ARM TechCon 2013

Ranked one of the top three must-attend events in the embedded industry, ARM® TechCon™ is more than a conference. ARM TechCon’s unique 360-degree interactive training ground seeded to connect, instruct, advise and enable the world of electronic and ARM-based computer design provides attendees with a comprehensive understanding of ARM-based technology.

Through technical sessions, hands-on labs, exhibits, demonstrations, keynote and panel discussions, chip designers, system implementation engineers and software developers obtain exclusive access to trending design strategies, methodologies and tools for building ARM-based products.

This year, ARM TechCon connects software to hardware communities, and both to ARM Ecosystem Partners. As hardware engineers and software developers continue to collaborate on designs and integrate technologies these communities now work synergistically to accelerate time to market and optimize their designs utilizing both hardware and software.


ARM TechCon 2013 combines sessions for chip designers, system implementation engineers, and software developers in a shared venue, facilitating communities’ interaction, learning and collaboration.

link: http://www.armtechcon.com/

Tuesday, August 6, 2013

Learning Java, 4th Edition

Learning Java, 4th Edition
Learning Java

Java is the preferred language for many of today’s leading-edge technologies—everything from smartphones and game consoles to robots, massive enterprise systems, and supercomputers. If you’re new to Java, the fourth edition of this bestselling guide provides an example-driven introduction to the latest language features and APIs in Java 6 and 7. Advanced Java developers will be able to take a deep dive into areas such as concurrency and JVM enhancements.

You’ll learn powerful new ways to manage resources and exceptions in your applications, and quickly get up to speed on Java’s new concurrency utilities, and APIs for web services and XML. You’ll also find an updated tutorial on how to get started with the Eclipse IDE, and a brand-new introduction to database access in Java.


Saturday, August 3, 2013

processing exercise: display image

To display image in Processing, the image file(s) have to be added in sketch's "data" folder. In Processing IDE, click Sketch from the menu bar, select Add File...


Browse to select the image file, click OK.


Example code:

PImage myImage;

void setup() {
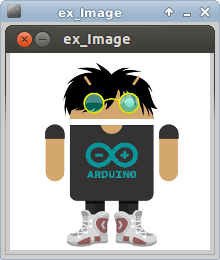
  myImage = loadImage("Arduino-er2.png");
  size(myImage.width, myImage.height);
  smooth();
}

void draw() {
  image(myImage, 0, 0);
}

processing exercise: display image


processing exercise: rectMode()

rectMode() modifies the location from which rectangles are drawn by changing the way in which parameters given to rect() are intepreted.

processing exercise: rectMode()

size(250, 250);
smooth();
strokeWeight(3);

fill(255, 0, 0);
rectMode(CORNER);  // Default Mode
/* the first two parameters of rect() as the location of one 
corner, and the third and fourth parameters as the location 
of the opposite corner.*/
rect(100, 100, 80, 80);

noFill();
stroke(200, 0, 0);  //set stroke color = red
rectMode(CENTER);
/* the first two parameters of rect() as the shape's center 
point, while the third and fourth parameters are its width 
and height. */
rect(100, 100, 80, 80);

stroke(0, 200, 0);  //set stroke color = green
rectMode(RADIUS);
/* uses the first two parameters of rect() as the shape's 
center point, but uses the third and fourth parameters to 
specify half of the shapes's width and height.*/
rect(100, 100, 80, 80);


Related: processing exercise: rect()

processing exercise: rect()

processing exercise: rect()


size(500, 300);
smooth();
strokeWeight(3);

//rect(a, b, c, d)
rect(50, 50, 100, 100);

//rect(a, b, c, d, r)
rect(200, 50, 100, 100, 20);
noFill();
rect(350, 50, 100, 100, 50);

fill(100, 100, 100);
//rect(a, b, c, d, tl, tr, br, bl)
rect(50, 200, 50, 50, 10, 0, 0, 0);
rect(150, 200, 50, 50, 0, 10, 0, 0);
rect(250, 200, 50, 50, 0, 0, 10, 0);
rect(350, 200, 50, 50, 0, 0, 0, 10);
rect(370, 220, 50, 50, 10, 0, 10, 0);
noFill();
rect(390, 240, 50, 50, 0, 10, 0, 10);


Related: processing exercise: rectMode()

Friday, August 2, 2013

Install Android Mode on Processing

Processing for Android is aim to make it easy to create Android apps using the Processing API. With Android developer tools and Processing installed on your machine, you can simply write a line of code, hit Run (Ctrl-R or Cmd-R), and have your sketch show up in the emulator as a working Android app. Select Run on Device (Ctrl-Shift-R or Cmd-Shift-R) to have it run on an Android device that you have plugged into your machine.

Steps to install Android Mode on Processing (2.0.1 currently):

- click on the Mode Selection Box on top-right.


- Select Add Mode...


- Install Android Mode.


- Close and re-start Processing, you can new Android option on the Mode Selection Box.


- In the first time running in Android mode, you will be ask to select the location of Android SDK, just click Yes.


- Browse to select sdk folder of Android SDK. If you cannot browse in the folder using mouse, just type in the Selection box manually.


- Click on the Run icon.


- It is the code of last example "processing exercise: arc()" running on Android.


processing exercise: arc()

processing exercise: arc()

size(400, 300);
smooth();
strokeWeight(3);

//arc(a, b, c, d, start, stop)
arc(50, 50, 100, 100, 0, PI*0.5);
arc(150, 50, 100, 100, 0, HALF_PI);
arc(250, 50, 100, 100, 0, TWO_PI);
arc(350, 50, 100, 100, 0, PI);

//arc(a, b, c, d, start, stop, mode)
noFill();
arc(50, 200, 80, 80, 0, PI+QUARTER_PI, OPEN);
fill(255, 0, 0);
arc(150, 200, 80, 80, 0, radians(300), CLOSE);
fill(0, 255, 0);
arc(250, 200, 80, 80, 0, PI+QUARTER_PI, CHORD);
fill(0, 0, 255);
arc(350, 200, 80, 80, 0, PI+QUARTER_PI, PIE);